We have a hand me down glider for our nursery that is super comfy, but the cushion fabric is beyond worn out. So I embarked on a cushion recovering adventure. I have to preface this post with the fact that I’m not a sewing expert – so please don’t judge my get-it-done techniques! But I did enlist the supervision of my mom for this project, which gains me some decent credibility.
Here is the Before & After, followed by the nitty gritty:

Before

After
I wanted to keep the cushions fairly neutral since I’m incorporating lots of color and pattern into other pieces in the room. I found some grey polka dotted fabric and decided to go for it. I picked up some white piping to offset the white polka dots, as well as some zippers for all three cushions, so I could wash the covers going forward.
I started by using a seam ripper to pull the existing fabric off the cushions, and marked the pleating on each piece.
I then pinned each piece like a pattern to the new fabric and cut them out.

I transferred the pleat markings onto the new fabric with a fabric pen.

To set the pleats, I pinned them in, and tacked them down by stitching the top to hold them in place for when I complete the cushion seams.


After setting the pleats, I began each piece with installing the zipper. I’ve never sewn in a zipper before, so my mom showed me the ropes.
Installing Zippers:
- Prepare the seam where the zipper will be placed by pinning the fabric together with right sides facing in towards each other.
- Plan out the placement of the zipper by laying it down on the fabric, and mark each end of the zipper onto the fabric. This will tell you where the seam will be open for the zipper.

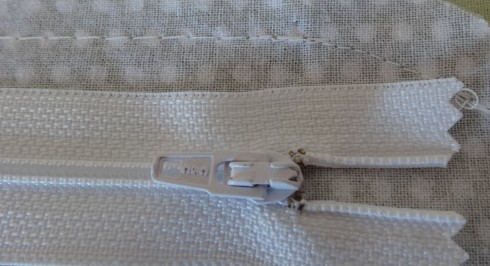
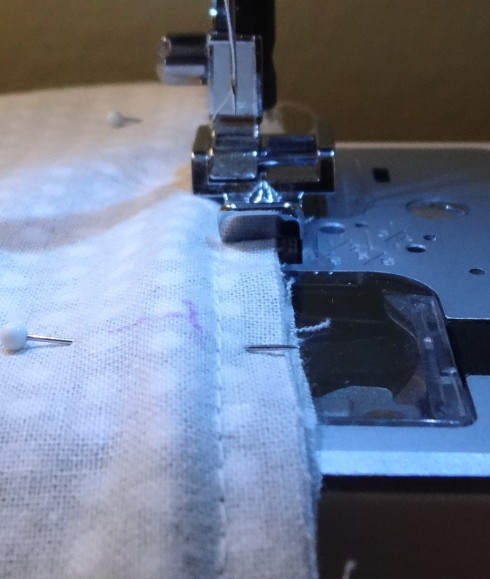
- Start to stitch the seam as normal, when you reach the first mark for the zipper start, backstitch to reinforce the seam, and then change your stitch setting to create a longer basting stitch. (This will allow for you to easily remove the seam for the zipper opening.) Continue the longer basting stitch until you reach the zipper end mark. Switch back to your normal length straight stitch, backstitch again like you would when you start a seam, and complete the rest of the seam. In the picture below, you can see that the stitches are much shorter on the right side, and the longer basting stitch begins where the zipper starts and follows to the left:
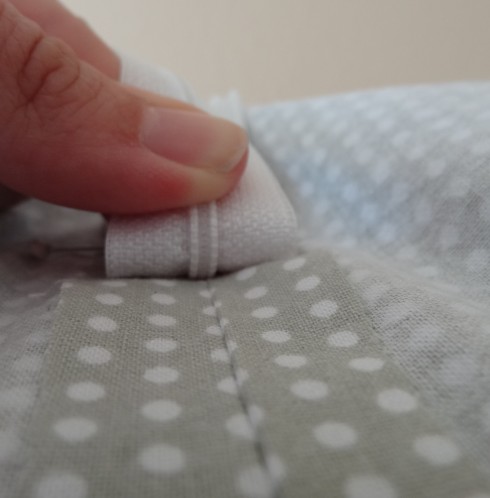
- Next, you’ll press the seam open, and line up the zipper onto the seam as you pin it into place.
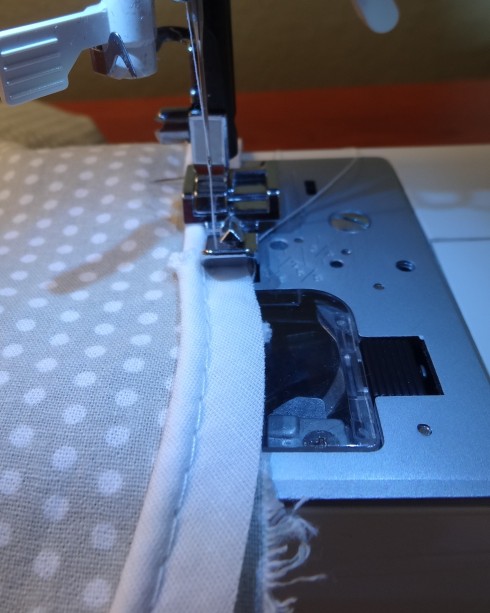
- Install the zipper foot onto your machine. With your fabric facing right side up, line up the edge of the zipper to the foot. (It seemed odd and a bit “blind” to stitch with the fabric right side up, but I learned that it does work better this way, since the “zipper hump” under the seam will guide you against the zipper foot.)
 Stitch along the edge of the zipper. When you get to the end, you can turn your stitch and stitch across the end mark of the zipper, making sure you have plenty of room for the zipper head to lie down at the top. I backstitched a couple of rounds across the end to reinforce it.
- Repeat step 5 on the other side and end of the zipper.
- Now that the zipper is sewn in, use a seam ripper to remove the long basting stitch to reveal your newly installed zipper!

Piping:
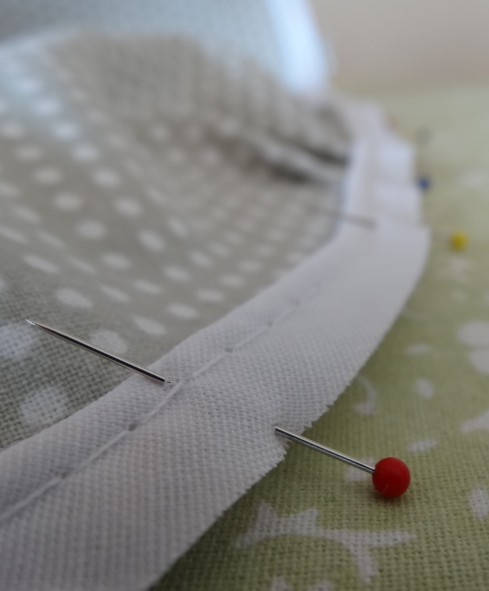
Since the existing cushion fabric had about a 1/4 inch allowance, it was pretty simple to pin the piping into place, since it too had about a 1/4″ allowance. I pinned the piping onto one side of the cushion fabric, with the right side of the fabric facing out, and stitched it into place by again using the zipper foot to line up against the piping.
 Next, I pinned the other side of the cushion fabric to the piped piece, with the right sides of the fabric facing in, and the piping sandwiched in between. With the first piping seam facing up, I again used the zipper foot to follow along the piping, using the first piping seam as my guide.
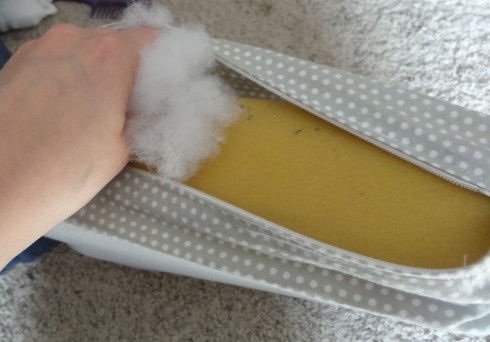
Once I completed the seam, my cushion cover was ready to be turned inside out (through the zipper opening), and have the cushion inserted into place! Once in place, I used some fiber fill to smooth out any loose edges in the cushion.

Creating a Cushion from Scratch:
Because the back cushion had seaming in the cushion, I decided it would be best to create a completely new cushion. I figured it would be too much to try and sew the seaming into the cushion, so I picked up a piece of foam, and then traced and cut out the new cushion piece. Because the foam was about half as thick as the existing cushion, I cut two pieces to double up the thickness.

With my other two cushions, I used the existing fabric to pattern the fabric and pleats, but in this case, I needed to measure and plan out the pleats onto my newly created cushion. I started by marking the edge of the single layer cushion onto the fabric, and then added another 1/3″ seam allowance, knowing that the seam would run along the center of the two foam pieces, and this would give me a little extra allowance for the doubled up cushion and 1/4″ piping allowance. I marked these measurements a number of times around the cushion and then cut the fabric freehand with markings as my guide.

Next, I pinned the fabric up along the edges of the cushion to plan out where I would need pleats to accommodate the curves in the cushion.
 Once pinned into place, I marked the pleat folds with my fabric pen, and then pinned and tacked the pleats into place like I did with the previous cushions and followed the same zipper and piping steps to finish.

I’m considering tufting the back cushion with some fabric buttons. I’ll certainly let you know if I do!

Tags: piping tutorial, recovering cushions, reupholstering, zipper tutorial


