
Remember this post last fall about the Kubb set? Not long after, I set about making a bag for the Kubb set. I sewed, I took pictures, and then I needed Velcro. This project has been sitting in my sewing room waiting for Velcro for months, but I finished this in five minutes the other morning.

To figure out the sizing of the bag I did a little measuring of my Kubb pieces to figure out how big I wanted the bag to be. This might look like scribbling to you, but it helped me cut my pieces.
- One piece 22″ by 10″ for the bottom
- Two pieces 10″ by 16″ for the sides
- One pieces 22″ by 16″ for the front
- One piece 22″ by 29″ for the back, and flap
- One piece 4″ by 40″ for the handle
 While wondering around the suburbs of Eagan my friend Johnna and I stumbled up on a garage sale with yards and yards of upholstery for sale- many of it in smaller pieces in bags for $1 and other larger pieces for $1 or $2 per yard. Most of these came from those big bags for $1! First I laid out the pieces to know how they would go together with right sides facing in. I began by pinning them, then sewing together the back, bottom and front pieces. To reinforce the seams I sewed a tight zig-zag stitch.

I then carefully pinned the sides into the front, bottom, and back piece as seen above.
 This is what the corners looked like when it was sewn together.

This is what it looked like right side out. I had nice square corners that the Kubb pieces would fit into nicely.
 This is the bag sewn together before I turned the edges over. Because this will be used for yard games I wasn’t too worried about having the most perfect edges. I turned them over once along all the edges not yet hemmed- if you wanted a cleaner edge you could line this bag or double turn the edges so the rough edge was no longer visible.
 Now to create the shoulder strap. I opted for one long strap that could go over the shoulder or across the body. Taking the long piece of fabric, I folded it in half lengthwise with the right side facing in. I then pinned the long two edges together and stitched them together with a straight seam. To flip the fabric rights side out, I used a scissor as seen above to push the fabric back through onto itself.
 When this was complete I turned in the fabric on the other end of fabric that was left opened and stitched across the end.
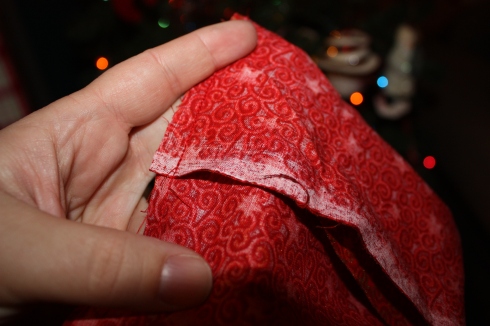
 I tacked both ends on the inside of the bag and reinforced it by sewing across the end several times. If you look closely you can see this above.
 For the last step I added a piece of velcro. I first sewed the velcro onto the top flap, then filled the bag and measured to see where the second piece should appear. I pinned it in place, emptied the bag and sewed a small square to keep it in place.

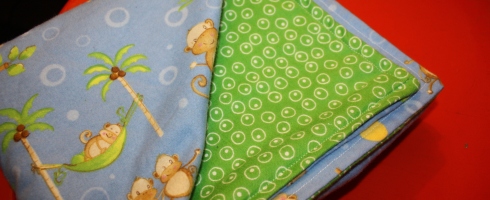
I had an extra piece of fabric I quickly sewed into a bag to hold the dowel throwing pieces. This way they wouldn’t easily fall out of the bag.
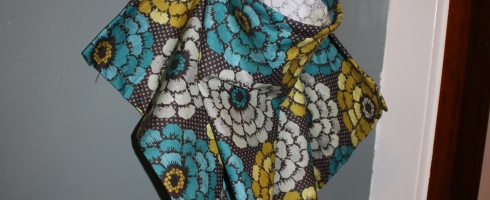
 Here is a close up of the bag.

Here is the full view of our new Kubb bag. I think it will transport easily to parks, camping excursions or in and out of the garage for a backyard game of Kubb. I plan on making a few more to fit the Kubb sets we have already gifted others!
Happy Friday everyone!


