Archive | of house and home RSS feed for this section

Yarn Wreath: Spring Edition

26 Mar

I got my Seasonal Yarn Wreath updated just in time for Easter.  I found a new version of felt flowers to make, via The Purl Bee’s Anemone Magnet tutorial.  I thought these were cute and colorful flowers to give a friendly boot to the snow, and hello to the sunshine!

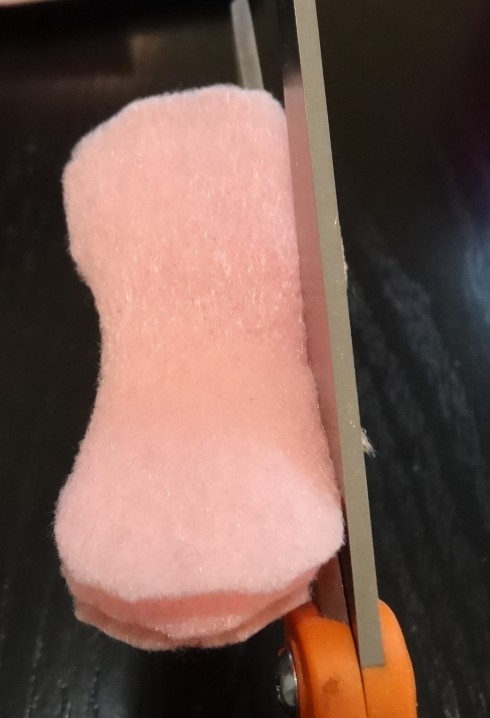
For each flower, I cut (free hand) three 1″x2″ strips of felt for the petals, and a thin 2″ strip to make the center of the flower.

DSC00117

I then shaped each petal.

DSC00120

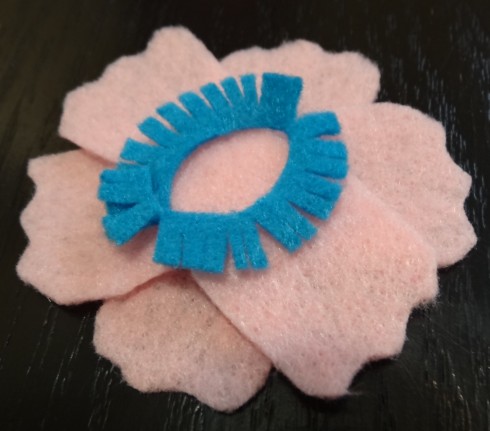
And snipped the thin strip into fringe.

DSC00122

I used fabric glue to glue the pieces together.

DSC00124

DSC00123

DSC00127

And then used a glue gun to adhere each flower to a felt base for the wreath.

DSC00137

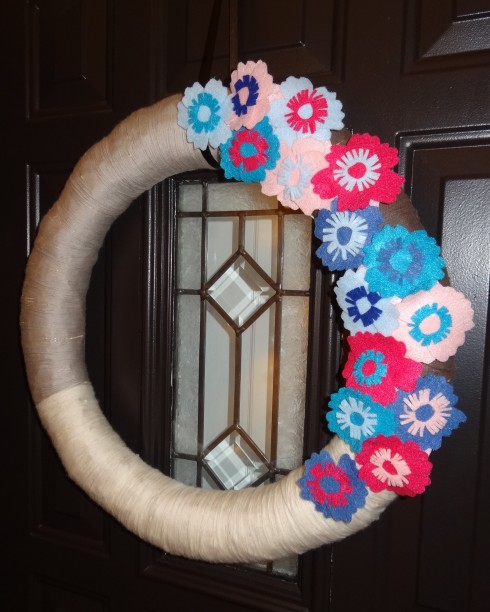
As you’ve seen me do in my previous wreath posts, I trimmed the felt base behind the flowers, and used extra yarn to tie the piece into place.  Here is how my door now greets you!

DSC00159

Tufting a Chair Cushion

20 Mar

I recovered my glider cushions a couple of weeks ago, and was considering tufting the back cushion with fabric buttons.  I decided to go ahead and try it.  I made a tufted headboard a few years ago, and have to admit there is something completely satisfying about making fabric buttons. I think it’s because they are so quick and easy to make, and the buttons look great!

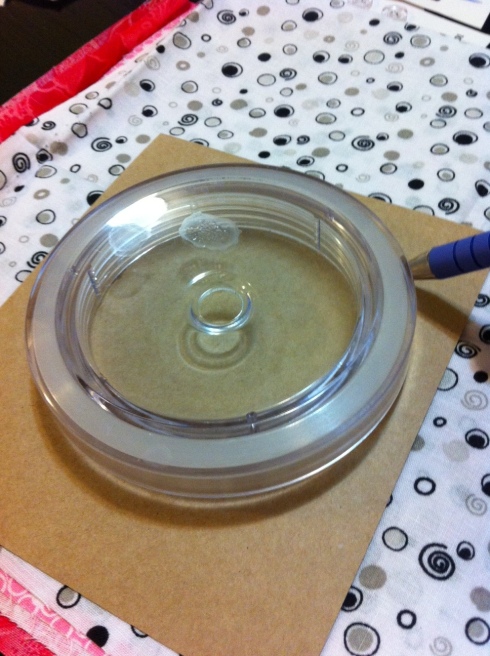
To make the buttons, I use a button kit that you can find at any fabric or craft store.

DSC00095

I had plenty of extra fabric from the cushion recovering project.  The button kit has a plastic template to trace the appropriate sized circles onto the fabric. I traced and cut out 9 circles to create 9 buttons.

DSC00069

To create the buttons, you place the metal button onto the circle of fabric and push it into the white button mold with the blue “push” tool.

DSC00070DSC00071

DSC00072

You then fold the fabric into the inside of the button, and press in the button back with the blue push tool.

DSC00081

Here is what the buttons look like when complete.  It’s pretty much impossible to screw these up…I love them!

DSC00078

After I had the buttons made, I used a needle and thread to sew them into the cushion.  I first figured out the pattern and spacing on the cushion, and started sewing them in one at a time.  Because I wanted to keep my options open for the look of the cushion, I didn’t sew the buttons all the way through to the other side of the cushion fabric. I just sewed them through one of the two pieces of cushion I used to make the back cushion (see my original post for the cushion making details).  This allowed me to have one side tufted and one side smooth.

When I first tried pulling the thread through the cushion, the thread just cut right through, so I improvised and used a thin piece of cardboard from a cereal box in my recycling bin to give me a hard surface to hold the thread in place.  You can see that I started the stitch through the cardboard and cushion  and then pulled it back through the cushion and cardboard.

DSC00082

I pushed the needle back through to the top of the cushion, pulling the thread taut and knotted the thread before sewing through the button back and completing the button placement. This creates the tufted dimension for pulling the buttons into the cushion.

DSC00084

To finish, I knotted the thread on the back of the piece of cardboard.  This was repeated for each button until the cushion was complete:

DSC00156

Yarn Wreath: St. Patty’s Edition

12 Mar

It’s time again to update my seasonal yarn wreath!  You can see how I originally created the wreath here.   For my March/St. Patrick’s day version, I repurposed a Shamrock Welcome Sign that I picked up on clearance for a few dollars.

DSC00100

I used a tin snips to clip the decorative wire that linked each letter together.

DSC00102

I decided to keep the decorative wire spirals in the front of each shamrock rather than leave the empty hole, so I used pliers to crimp the back of the wire down after cutting each piece.

DSC00106

I also removed the bow from the top ‘W’ Shamrock.  I scraped off the glue as much as I could and used some sandpaper to sand it down to a flatter finish.  I then used some of the spare wire I cut off the other pieces to glue in a wire spiral for further camouflage to the blemished area.

Once I had my Shamrock letters ready, I laid them out on the wreath, and cut some base felt pieces that would be used to hold everything together.

DSC00110

I used my glue gun to glue the letters to the base felt.  Once everything was glued in place, I trimmed the felt around each shamrock.

DSC00112

To fasten the piece in place, I used a length of yarn to weave between the letters and around the wreath, and then fastened the yarn in back, just as I  had done for my previous versions of the yarn wreath.  The first and last letters weren’t holding in place as well, so I added a piece of stick-on velcro to these two pieces.  I used the rougher side of the velcro, which naturally adhered to the yarn on my wreath.

This makes me ready for more green! I hope the snow will take the hint.

DSC00115

Recovered Glider

6 Mar

We have a hand me down glider for our nursery that is super comfy, but the cushion fabric is beyond worn out.  So I embarked on a cushion recovering adventure.  I have to preface this post with the fact that I’m not a sewing expert – so please don’t judge my get-it-done techniques!  But I did enlist the supervision of my mom for this project, which gains me some decent credibility.

Here is the Before & After, followed by the nitty gritty:

Before

Before

After

After

I wanted to keep the cushions fairly neutral since I’m incorporating lots of color and pattern into other pieces in the room.  I found some grey polka dotted fabric and decided to go for it. I picked up some white piping to offset the white polka dots, as well as some zippers for all three cushions, so I could wash the covers going forward.

I started by using a seam ripper to pull the existing fabric off the cushions, and marked the pleating on each piece.DSC00027

I then pinned each piece like a pattern to the new fabric and cut them out.

DSC00031

I transferred the pleat markings onto the new fabric with a fabric pen.  

DSC00033

To set the pleats, I pinned them in, and tacked them down by stitching the top to hold them in place for when I complete the cushion seams.

DSC00042

DSC00043

After setting the pleats, I began each piece with installing the zipper.  I’ve never sewn in a zipper before, so my mom showed me the ropes.

Installing Zippers:

  1.  Prepare the seam where the zipper will be placed by pinning the fabric together with right sides facing in towards  each other.
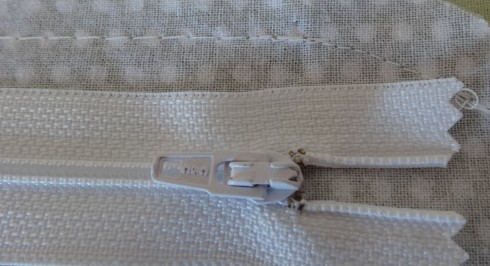
  2. Plan out the placement of the zipper by laying it down on the fabric, and mark each end of the zipper onto the fabric. This will tell you where the seam will be open for the zipper.DSC00067
  3. Start to stitch the seam as normal, when you reach the first mark for the zipper start, backstitch to reinforce the seam, and then change your stitch setting to create a longer basting stitch. (This will allow for you to easily remove the seam for the zipper opening.)  Continue the longer basting stitch until you reach the zipper end mark.  Switch back to your normal length straight stitch, backstitch again like you would when you start a seam, and complete the rest of the seam. In the picture below, you can see that the stitches are much shorter on the right side, and the longer basting stitch begins where the zipper starts and follows to the left:DSC00050
  4. Next, you’ll press the seam open, and line up the zipper onto the seam as you pin it into place.DSC00052
  5. Install the  zipper foot onto your machine.  With your fabric facing right side up, line up the edge of the zipper to the foot.  (It seemed odd and a bit “blind” to stitch with the fabric right side up, but I learned that it does work better this way, since the “zipper hump” under the seam will guide you against the zipper foot.)DSC00053Stitch along the edge of the zipper.  When you get to the end, you can turn your stitch and stitch across the end mark of the zipper, making sure you  have plenty of room for the zipper head to lie down at the top.  I backstitched a couple of rounds across the end to reinforce it.
  6. Repeat step 5 on the other side and end of the zipper.
  7. Now that the zipper is sewn in, use a seam ripper to remove the long basting stitch to reveal your newly installed zipper!DSC00041

Piping:

Since the existing cushion fabric had about a 1/4 inch allowance, it was pretty simple to pin the piping into place, since it too had about a 1/4″  allowance.  I pinned the piping onto one side of the cushion fabric, with the right side of  the fabric facing out, and stitched it into place by again using the zipper foot to line up against the piping.
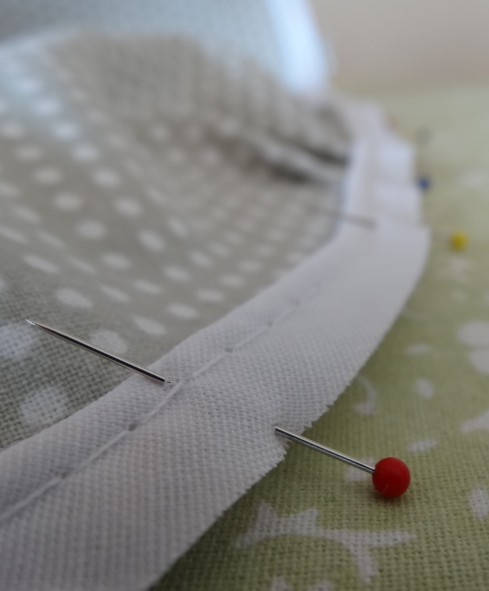
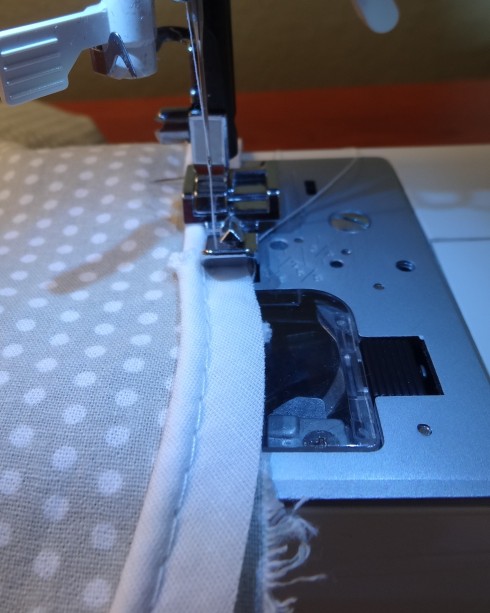
DSC00045

DSC00047Next, I pinned the other side of the cushion fabric to the piped piece, with the right sides of the fabric facing in, and the piping sandwiched in between.  With the first piping seam facing up, I again used the zipper foot to follow along the piping, using the first piping seam as my guide.
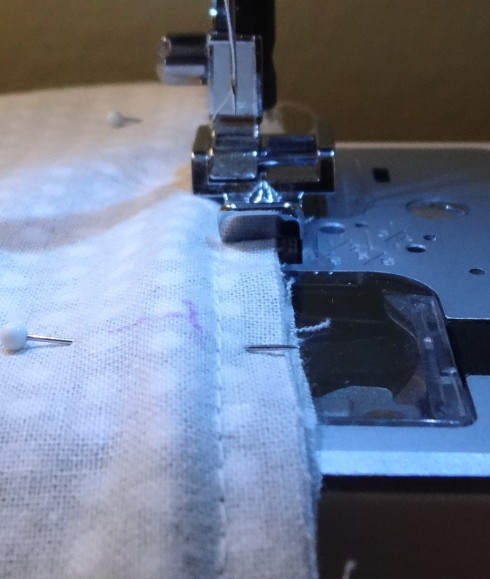
DSC00049

Once I completed the seam, my cushion cover was ready to be turned inside out (through the zipper opening), and have the cushion inserted into place!  Once in place, I used some fiber fill to smooth out any loose edges in the cushion.
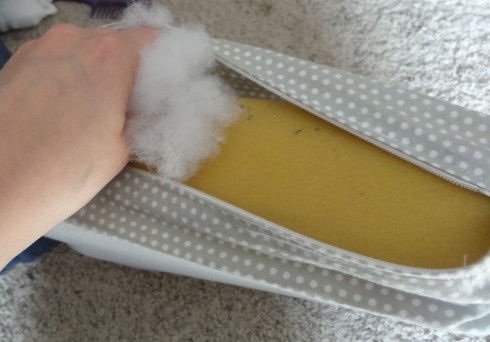
DSC00056

DSC00091

Creating a Cushion from Scratch:

Because the back cushion had seaming in the cushion, I decided it would be best to create a completely new cushion.  I figured it would be too much to try and sew the seaming into the cushion, so I picked up a piece of foam, and then traced and cut out the new cushion piece. Because the foam was about half as thick as the existing cushion, I cut two pieces to double up the thickness.

DSC00058

With my other two cushions, I used the existing fabric to pattern the fabric and pleats, but in this case, I needed to measure and plan out the pleats onto my newly created cushion.  I started by marking the edge of the single layer cushion onto the fabric, and then added another 1/3″ seam allowance, knowing that the seam would run along the center of the two foam pieces, and this would give me a little extra allowance for the doubled up cushion and 1/4″ piping allowance.  I marked these measurements a number of times around the cushion and then cut the fabric freehand with markings as my guide.

DSC00063

Next, I pinned the  fabric up along the edges of the cushion to plan out where I would need pleats to accommodate the curves in the cushion.

DSC00064 Once pinned into place, I marked the pleat folds with my fabric pen, and then pinned and tacked the pleats into place like I did with the previous cushions and followed the same zipper and piping steps to finish.

DSC00093

I’m considering tufting the back cushion with some fabric buttons. I’ll certainly let you know if I do!

Ombre It Is!

26 Feb

A few weeks ago I polled The Craftery readers to see which direction I should take next with my Changing Table Makeover.  I had already updated the piece by painting it white, but wanted to also add some color to the drawers.

Before

Before

After

After

The following Ombre Inspiration won the vote!  

Ombre

The question was which color?  I had finally decided on my nursery bedding, which was going to help me set the color scheme for the room.  I took it to the paint store and found these paint chip samples to match my bedding. I was either going to go with turquoise or coral for the Ombre drawers.

011

After finding a turquoise rug for the room, I decided to go with the coral tones on the changing table.  I picked up 3 sample pints in the darker 3 tones on the paint chip card and was on my way.

Paint

This weekend my husband kindly painted the drawers with each color as well as added a polyacrylic  coat.  It’s so fun to see these colors in the room!

Dresser


River Rock Boot Tray

12 Feb

I have a cheap plastic boot tray inside my back door during the winter that does the trick, but is a bit too long for the tight corner it sits in.

20130212-093341.jpg

I’ve seen different versions of DIY boot trays online, and have always liked the ones that use river rocks. So I went off to the dollar store to find a right sized tray of sorts, and some river rocks.

I ended up finding a good sized cookie sheet and 3 bags of river rock that I thought would work just fine. I may h ave gotten a couple of puzzled looks as I sized up my shoe on the cookie sheet in the store…

20130212-093302.jpg

I spread the river rock onto the cookie sheet, and voila! I have a new, much better looking and fitting boot tray! I’m going to go get one more bag of river rock at the dollar store to fill it in a bit more, but I’m happy with the quick outcome.

20130212-093318.jpg

Earring Frame

5 Feb

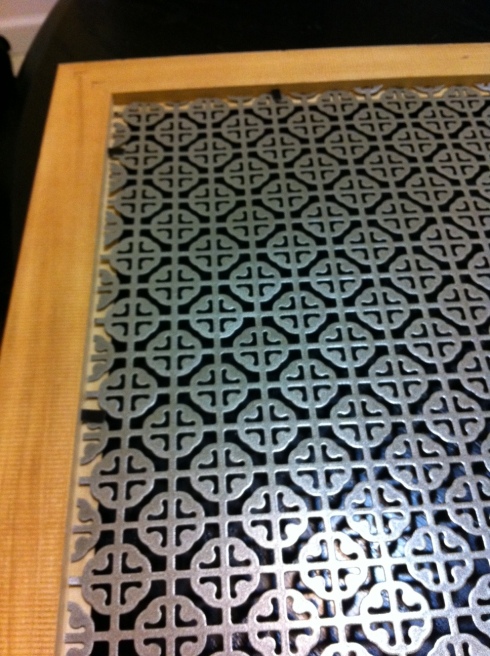
I’ve had an earring holder on my to-do list for a long time. Tashia already inspired us all when she made two great framed versions in this previous post.  I tried a slightly different framed version using a 1×2 foot panel of decorative sheet metal that I picked up at Home Depot.

Panel

I had an 11×14 inch frame in my collection of unused frames, so I just needed to cut down the panel of sheet metal to fit the frame opening.  I measured and marked the panel with a sharpie, and then used a tin snips to trim it down to size.

Snipping

Once trimmed, I fastened the panel into place with the metal tabs on the back of the frame.

Framed

All I had left to do was fill it with my earrings!

photo 3

I plan to add some color to this earring frame this spring or summer when it’s warm enough to spray paint.  I think I’ll paint the sheet metal to give some contrast to my earrings and may paint the frame as well.  Stay tuned!

Yarn Wreath: Valentine’s Edition

29 Jan

Valentine’s day is just around the corner, so it’s time to update my seasonal yarn wreath project!  If you didn’t see them before, you can check out my Autumn and Christmas version from previous posts. I had created the neutral yarn wreath in the fall, with the intention of being able to change out a seasonal embellishment.  I decided to try out some no-sew fabric flowers this time around, so I picked up some felt sheets and fabric fat quarters in Valentine’s colors.

Supplies

I based my flowers off of this online tutorial from Ruffles and Stuff.  I wanted to make my flowers pretty big to switch it up from the smaller scale decor I used in my previous versions, so I used the top of a large water tumbler as my circle guide (it’s about 4″  in diameter).  I first traced it onto the piece of card stock that was in with the fat quarter, and then used that as my pattern on the fabric. I made 8 circles for each flower.

Circle

The next step is to fold the flower in half twice, so you have a quarter of the round, and then snip off the center point.

Center snip

I cut a smaller circle (freestyle) out of some scrap felt to use as my flower base.  Then I used my trusty glue gun to glue the piece in the center.  Snipping the center point of the folded circle allows for all edges of the folded piece to glue down into place.

Glue to Base

Once I had 4 folded circles glued down, I added another layer with the remaining 4 circles of fabric.

8 circles

I found some buttons in my button stash, and glued a button down into the center.

Button

This was pretty quick and easy, so I completed three flowers in no time.  I imagine these flowers could also be used to make a cute headband, hair clip, or sweater pin. Plus, if you have lots of fabric scraps around, this is a great way to use them up!

To finish my wreath embellishment, I thought I’d also incorporate some hearts.  I cut a simple heart out of paper and traced it onto the pink felt I had.

Heart

I placed the flowers and felt hearts onto a white felt base for the wreath, and used my glue gun to attach each piece to the base.

Placement

Once everything was glued on, I trimmed up the felt base so it was out of view.  To attach the flower piece to the wreath, I used the same method I did for the previous versions – I fastened the piece into place by weaving a piece of yarn through the flowers and around the wreath in about four different places, and tied it in the back.  This made for a very easy way to remove the other piece.  You can see this in more detail here, along with how I created the yarn wreath.

Final Wreath1
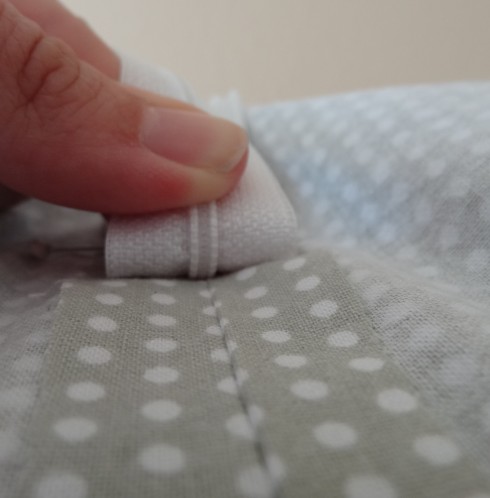
I honestly was in a bit of time crunch when I tackled this project, so I whipped this up pretty quickly – but I have to say, I think it might be my favorite one so far.  I think the light and bright colors are a nice change from the previous two seasons.  I’m looking forward to creating another bright version for spring and maybe even one for St. Patty’s Day!

I’m linked up to:
homework

Yarn Bowls

8 Jan

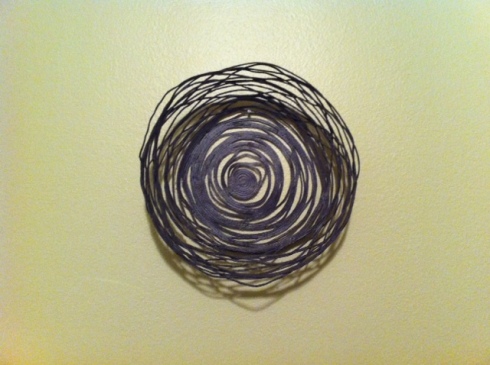
I’ve been making some headway on using up my yarn stash, but I still have lots to use up.  Check out our previous Yarn Stash Buster projects here.  My latest yarn project was to try creating some yarn bowls with paper mache paste. I found this yarn bowl pin and paste recipe via Pinterest.

I decided to try making three different bowls using different sizes, color, and style.  Considering I wasn’t spending an extra dime to make them, I had no qualms about experimenting with what works best.

I started by making the paste – I halved the recipe from the link above:

Combine 1/4 cup flour and 1 cup cold water in a bowl.
Boil 1 cup of water in a sauce pan and add the flour and cold water mixture.
Bring to a boil again.
Remove from heat and add 1.5 tablespoons of sugar.
Let cool. The paste will thicken as it cools.
 Paste
While the paste cooled, I prepared my bowls. I used three different sized and shaped bowls, and covered them with plastic wrap (I had press and seal on hand).
Bowl Prep
I then grabbed three different colored yarns from my stash – orange (wool), grey (cotton), and cream (cotton).  I started with the orange yarn, by putting a couple feet of yarn into the paste.  As I used up the yarn, I pulled more yarn into the pot of paste.
Yarn in paste
I used my fingers to pull off the excess paste as I pulled it out of the pot to work with it on my bowl.  For this design, I wanted to make lots of little circles to create a pattern. I did this by cutting the yarn after completing each circle, but making sure all of the circles made contact so they remained glued together.
Creating Yarn Bowl
For the second bowl, I used a bowl with more decorative dimension to give the bowl a more interesting shape.  The pattern I ended up making was a bit more free flow – and reminded me of peacock feathers – It might be kind of cool to do a multi color version to really play up a peacock pattern next time.  Although this was a bit more airy in design, I made sure that each peacock eye made contact with each other to create stability for the bowl.
Cream Bowl
The third bowl, made of grey yarn, was the most free flow of all, and mostly followed the design of the original Pinterest inspiration.  Again, I kept the design pretty airy, but included contact points within each round to ensure stability.
Grey Bowl
I let the bowls dry for about 24 hours – It took quite a long time for the paste to dry, and I ended up placing them in front of a heat vent for the last 2 hours to speed up the final drying process.  Had I done this right away, it would have required less drying time.  Once they were dry, I took them off the bowls by first removing the plastic wrap from the bowl, which made it easy to pop it off of the bowl mold.
Removing Plastic 1
Once it was off the bowl mold, I could peel the plastic wrap from the yarn bowl.
Removing Plastic 2
I had a couple of small mishaps – First: the “Press and Seal” had white logos printed on it, and it unfortunately transferred onto the yarn.  I was able to remove this by using a damp paper towel to lightly scrub away the print. These spots dried just fine, and the “Press and Seal” logo was successfully removed.
Print
Second: One of my orange circles was not pasted to the rest of the bowl very well.  I used some fabric glue to fix this, and it solved the problem.  I think regular Elmer’s glue would have also worked just fine.
Glue Fix
The bowls can be used for pure decoration alone – include on a bookshelf or as a piece on your coffee table.  Or use as a jewelry holder:
Jewelry
A catch all on your night stand:
Bedside Collect All
Or hang it on the wall:
Wall Hanging
I like this one on the wall so much, I’m thinking of making two more to have a grouping of three to hang on the wall.
This was a fun project, and I have a lot of ideas of what I would do differently for patterns next time, as well as different ways I could make things other than bowls with “yarn mache”.
I’m linking up to:

homework

Ch-Ch-Changes

3 Jan

My husband and I are expecting our first baby in the spring, so I must forewarn you all that this is likely the first of many nursery project posts in the coming months.  We started tackling the nursery over the holiday break, and first up  is a changing table makeover.

We are grateful to have recieved some hand-me-down nursery furniture from my husband’s brother and his wife.  The changing table is in great shape, but the look of the wood was a bit rustic for the style in our house, so I decided to give it a little makeover to create our own look.  Here’s what the changing table looked like before (the top shelf folds down for the changing table):

Ikea Diktad Change Table-735827

I had found a few things on pinterest that inspired me to do something fun with the drawers of the dresser, but I decided the first step was to paint the whole thing white, regardless of what I would do with the drawers.  So the hubby was tasked with priming and painting this bad-boy white (loving how this pregnancy stuff gets me out of a lot of the dirty work – I just get to be the artistic director!).

You can see more details on my furniture painting method in this previous post.  I’ve found the main thing is to use a small roller vs. a brush.  Here’s the AFTER picture of the first phase of the white changing table:

Changing Table After

Next up is to decide if I’ll do anything fun to spice up the drawer fronts.  Here is some inspiration I’ve found on Pinterest.

Tri-color

Tri-Color

Wallpaper

Wallpaper

Chevron

Chevron

Ombre

Ombre