Archive | Tools, Tools, Tools RSS feed for this section

A Salvaged Seat

14 Feb

I work for a non-profit organization managing volunteers and coordinating donations. Today I spent much of my day traversing the Twin Cities in 15 ft. truck picking up and dropping off donations with my colleague.

We received three great chairs along with a table for our residents, but the seats were worse for the wear after spending some months on a porch.

IMG_1319

I wouldn’t want to sit on that. Would you? So I brought them home tonight to give them a little make-over with some fabric.

I think I’ve already mentioned one of my favorite past-times is garage and yardsaling in the summer.  One day this summer I stumbled upon a woman selling loads of upholstery fabric scraps for cheap at $1 a bag. I also bought some larger pieces between 2 and 5 yards for less than $5 each-also a steal of a deal. I now have a chest full of upholstery scraps that looks like this at the moment.

IMG_1321

In hunting through the scraps I found two coordinating pieces big enough to cover three chairs.

IMG_1322

I first removed the seat by unscrewing the four screws that held it on underneath. I then layed it on the fabric- you can see the wrong side of the fabric and the underside of the seat here.  I used a sharpie as I didn’t have a chalk pen to quickly trace out where I should cut off extra fabric- you’ll see the pink line above.

IMG_1324

I pulled the fabric taut on side and stapled two or three staples along the edge of the side beginning in the middle.  (I used an Arrow model T50 heavy duty hand stapler that I have had for ages with 3/8 inch staples. I bought this years ago to reupholster a footstool and I’ve used it dozens of time since- it really is a worthwhile tool to invest in!)Then I pulled it taut and stapled the fabric on the other side slowly making my way to the corners on two opposite sides.  I then repeated those steps on the other sides- checking my work every few staples to make sure things were taut without stretching it too tight.

IMG_1325

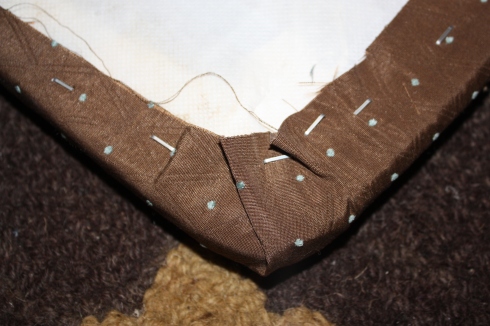
Then I finished the corners. I first folded one corner in more and stapled it.

IMG_1327

I then pulled the other side taut, making folds as I needed to and stapled it again a few times to make sure it was secure.

IMG_1328

This is a finished corner.

IMG_1331

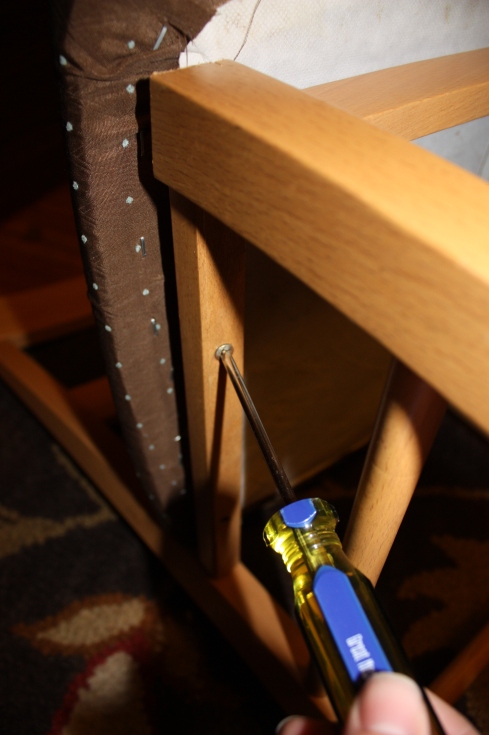
I then attached the bottoms using the same four screws I took out of each. They went in fairly easily and I was able to poke them through the new fabric where the original holes had been covered.

IMG_1336

While the fabric is a bit formal for the blond wood, I think they turned out pretty great and will make some of our resident’s pretty happy. I have to say they turned out well for a project I completed under an hour that didn’t cost me a penny. Stay tuned next week for another project from my upholstery stash!

Earring Frame

5 Feb

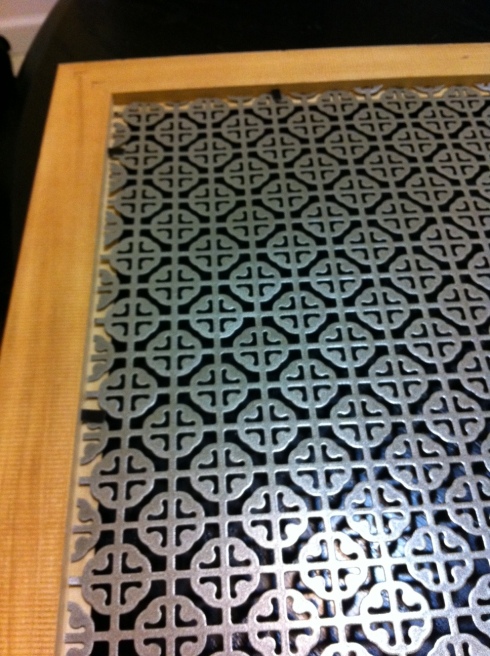
I’ve had an earring holder on my to-do list for a long time. Tashia already inspired us all when she made two great framed versions in this previous post.  I tried a slightly different framed version using a 1×2 foot panel of decorative sheet metal that I picked up at Home Depot.

Panel

I had an 11×14 inch frame in my collection of unused frames, so I just needed to cut down the panel of sheet metal to fit the frame opening.  I measured and marked the panel with a sharpie, and then used a tin snips to trim it down to size.

Snipping

Once trimmed, I fastened the panel into place with the metal tabs on the back of the frame.

Framed

All I had left to do was fill it with my earrings!

photo 3

I plan to add some color to this earring frame this spring or summer when it’s warm enough to spray paint.  I think I’ll paint the sheet metal to give some contrast to my earrings and may paint the frame as well.  Stay tuned!

All Faucets are not created Equal

6 Sep

In our minds The Craftery isn’t just sewing needles, crochet hooks and paintbrushes.  Our world of craftery also forays into home improvement.

It all started so simply. The faucet was leaking on the upstairs bathroom sink and the stopper on the sink had not worked for the entirety of the 3.5 years I had lived in my home. The pedestal sink itself was chipped underneath.  This bathroom also had little to no storage. Changing out a sink couldn’t be that difficult, right?

A few weeks earlier I had purchased the sink and cabinet at Home Depot for $150 and the faucet for a mere $25.00.

3 trips to my trusty Ace hardware, one trip to Menards,  and 2 trips to Ace later I was in business. Did I mention this process took me three days?

Part One: remove the old sink.  I got so excited I forgot to take photos- oops!

Step one. Shut off the water to the sink. Immediately I knew I was in trouble. My shut off valves looked like this. Have I mentioned that my home was built in 1924?

 I could shut them off, but when I tried to disconnect them- the entire valve started twisting off (not a good thing!). So I shut off the water to the whole house. Ran the water enough to empty out the pipes and then proceeded to take off the shut off valve, which was connected to the sink.

Next I disconnected the waste water pvc pipes.  These come apart fairly easy. Just make sure you have a bucket to catch anything that is caught in the trap.

I then used a utility knife to cut the bead of silicon caulk that ran along the back of the sink. The bottom pedestal portion of my pedestal sink was NOT connected to the top so I removed it and held the sink up with  my hands while unscrewing the bolts from the wall. The bolts and metal piece held up the sink.  NOTE: I would NOT do this alone.  It could have easily come crashing down on me or on the tile and smashed either the tile or hurt me. Fortunately it didn’t.

Eventually the sink just came loose when the metal piece was loosened So I carried the top, then the pedestal out to the curb where someone else picked them up or the trash man found them the next morning.

This was the first run to Ace Hardware for the shut off valve.  They are ever so helpful and asked why I had not brought the valve with (it was still stuck to the sink in the back alley).  I purchased a valve for ½ inch pipe only to arrive home and find it was too big.  So I went out back and disconnected the very rusted fitting  for my second trip to Ace where the helpful folks helped me find the correct piece.  Success!

I installed the new shut off valve and turned back on the water to find I had a little drip.  I used a wrench to turn the valve on a little tighter and the leak was gone.

Installing the faucet

I installed the faucet per the instructions on the Glacier Bay box.  They were fairly straightforward, but when I went to connect the waste water pipe I discovered that I was quite a few inches off.

One hasty trip to home depot and I had the new pieces I needed to get the appropriate connections for the trap to connect to the sink.  I used my handy dandy mini hack saw to cut the pieces to fit as shown below Everything was installed- water was turned on… and I had many a leak near the sink.

I needed a new wrench, but it was 11:00 pm- so this project had to sit again over night so I could pick up the wrench I needed.

And after work that night I let the mega wrench I purchased at Menards work it’s magic-the leak stopped coming from the sink, but it was now coming from the faucet itself which mean the faucet itself was faulty.  My second trip to Home Depot for a faucet was a quick decision- quality but not ridiculously priced. I just wanted it to work.

The minute I opened the box I could see the difference. The pieces of the faucet were metal (not plastic like the other broken model) and it went together like a dream (once I had pulled the other one apart).

Three days of brushing our teeth in the kitchen sink could have been eliminated had I known the following:

(1)   Start with the appropriate tools. Make sure you’ve got a wrench big enough to do the job you need to do.
(2)   Have an assistant to help you hold things as you pull them apart (or tighten them, or merely to hand you a beer while you toil over the sink).
(3)   Make sure you know what size of pvc pipe you are working with- bring it with you if you need to replace pieces.  Take a photo if you are going to need additional help once you get to the hardware store/home depot.
(4)   DO NOT BUY CHEAP FAUCETS. Apparently this is a new homeowner lesson learned. I posted on Facebook my cheap faucet woes and was rewarded with many a story from friends and family of similar trials with cheap faucets.

This was my first full installation completed entirely by myself and while it took longer and cost more than I expected the photo below is reward enough for me.

The Game of Kubb

5 Sep

Memorial Day weekend 2011 was a bust. At least in terms of camping, but despite a muddy marshy campground a few highlights of that trip have stuck with me more than a year after my friends and I made day trip to Nerstrand Big Woods State Park. (Highlight 1) Our detour on the way to the campground to visit a garage sale procured a fabulous wooden floor lamp for a $1. You’ll hear more about my $1 wood lamp in a future post. (Highlight 2) When we finally arrived I was introduced to the lawn game Kubb (pronounced Koob).

Fast forward 8 months later when I met my fiance Fred. On one of our first dates he mentioned his favorite yard game Kubb.  We’ve since spent quite a few hours playing Kubb this spring and summer with friends and family.   Kubb is a Nordic game originating on the island of Gotland, Sweden, in which two opposing teams take turns throwing wooden dowels at 4 X 4 pieces of wood in attempts to knock them over.  Full directions for the game can be found at here.

In the past month we’ve made two sets for friends and family, one as a shower gift and one as a retirement gift, and both were warmly received.

Supplies for a set of Kubb

  • 1 8 ft. 4 X4 piece of lumber- either cedar or fir. I would not use treated lumber as it will be too heavy and not nearly as pretty as either of the other two options. Look for pieces of wood that are straight with fewer knots.
  • 2- 1 ¼ inch dowels/closet rod in 4 ft. in length
  • Table Saw
  • Mitre Saw or Radial Arm Saw (you could also use a hand saw and mitre box if you were really determined, but it would take a LOT of work)
  • Safety glasses
  • Pencil
  • Tape Measure

To note: This Kubb set is not to tournament specifications, but it is the size that we have been playing with and it works great.

First, we measured out 7 7/8 inches and marked it on the 4 X 4.  We used the mitre saw to cut on the line.  Unfortunately, my mitre saw does not have a big enough blade to cut through the 4 X 4 without leaving a small piece uncut.  Once the original cut was made we simply turned the wood and made sure to line up the blade with the original cut line and cut once more to cut straight through.  You now have your first Kubb block!

We repeated this process nine more times to make ten Kubb blocks.  To simplify we used the first Kubb block as a template for the next nine we cut.  The remaining piece of wood should be 16 inches and will be your Kingpin with a total of eleven pieces- one of which is longer than the others.

We then measured marked 12 inches on the dowel, using the mitre saw to make the cut.  Again we used the first dowel we cut as a template for cutting five additional dowels for a total of six dowels that will be used as your throwing pieces. You should have approximately 2 feet of dowel remaining.  Cut this into 6 pieces four inches long. These will be your game play markers.

To shape the Kingpin we used a table saw.  We set the blade at 45 degrees and approximately 1 inch deep.  The guard rail was set to 3.0 inches.

Holding the kingpin perpendicular to the guard we cut each side of the kingpin.

We then removed the guard and reset it on the other side of the blade at 4.5 inches.  Holding the kingping perpendicular to the guard we cut each side of the kingpin.

You may have to stop the saw each time to remove the small piece of wood that is removed on each side of the Kingpin.  You now have all the pieces of your Kubb set.

We sanded each board to remove excess slivers and splinters from the cutting process and to smooth them out.  At this point you could stain the pieces in a variety of colors, or as we did, gift them in their natural state.  We also thought it would be fun to throw a couple of permanent markers in a variety of colors in the bag and have everyone that plays sign a piece of the set.

I printed off a set of Kubb rules from this site and put them back to back in a self sealing laminated pouch to include with the gift set.

We tried a few options for storing the game. We bought a duffel bag for $15 from Target, but didn’t like the looks and the fit wasn’t quite right.  We found a a beer case box works great to hold the Kubb set in a pinch, but probably won’t hold up for the long haul.

Instead, we promised the lucky recipients a handmade Kubb carrying bag in the future, and I’ll be back with directions and a tutorial on making a Kubb Storage bag soon.

The Painted Headboard

28 Aug

I was looking for a headboard on Craigslist – something cheap that I could either refinish, paint, or upholster.  I swear I wasn’t even searching the free section, but I came across a headboard listed for free, and it seemed like just the ticket.  The finish was a bit scratched up, but really not bad.  My plan was to paint the headboard to match the nightstands I had redone. See that post here.

I started by sanding it down with my orbital sander to smooth out the scratches.  I didn’t sand the entire finish off, but just gave it a quick once over before priming and painting.

When painting furniture, I prefer to use small foam rollers rather than a traditional paint brush.  This helps put on a light even coat without leaving any brush strokes behind, and helps avoid leaving too much paint on the piece, which can pool and drip and not look so pretty.

I wiped down the sanded headboard to remove any excess debris, and started priming with the foam roller. One light coat of primer is all you need for the paint to adhere.

Once the primer was dry, I started painting.  I used the same black/brown paint that I had used on the nightstands.  I used the foam roller to paint the entire piece, and used a small foam brush to fill in corners and crevices.

Two coats of paint later, I had an updated headboard to match my nightstands!

I still have a lot to do to finish this room.  Stay tuned for future updates!